Customer Tab
Add and edit general customer information on the Customer tab, such as: reference program status, social media presence, and general customer data (be aware that data pulled from a CRM cannot be edited). The customer visibility within the customer search is controlled here.
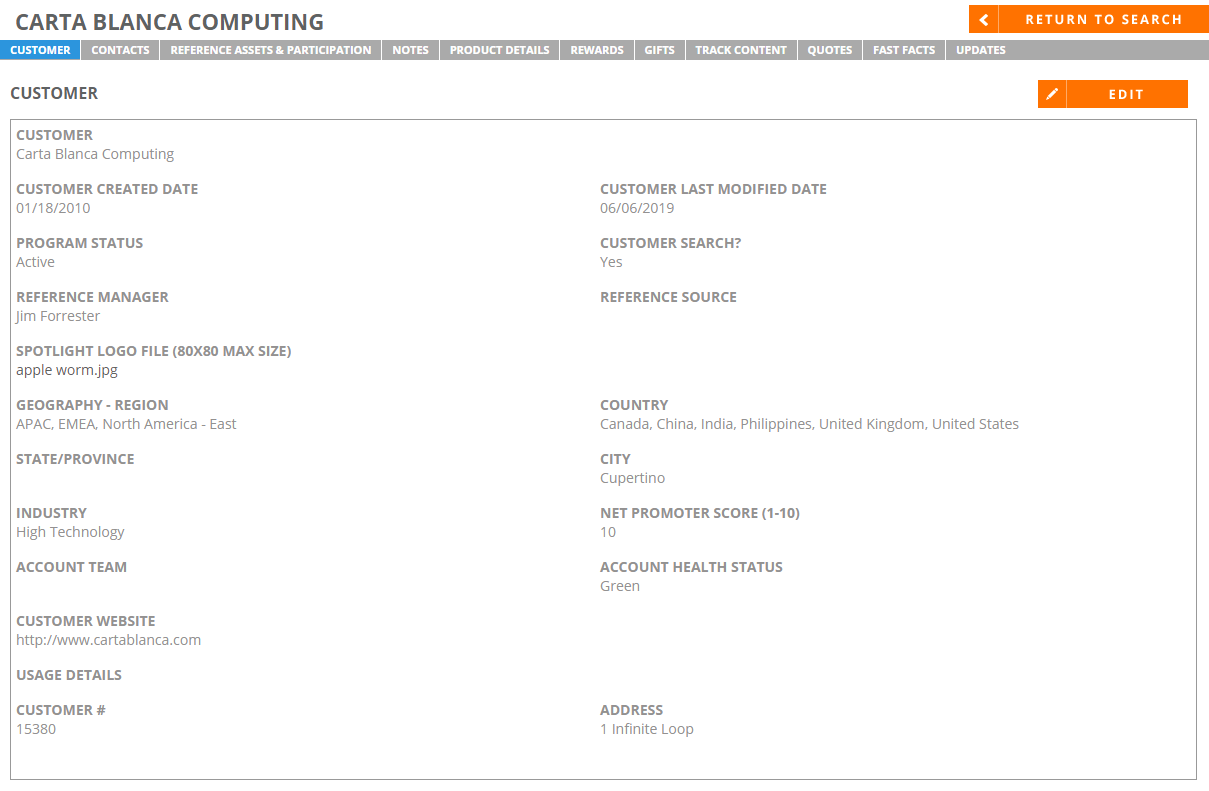
Viewing & Editing the Customer Tab
- After performing a search and viewing the results found on the Customers tab, click Edit to update any information found on a particular customer record.
- Navigate to the Customer tab.
- Click Edit to update the information in the available fields and drop-down menus.
- Customer: Enter the customer name.
- Address: Enter address details in the Address 1, Address 2, City, Postal Code, Country, and State fields.
- Customer Search: Determine whether this customer should appear in the search.
- Yes: Makes this customer searchable by all portal users.
- No: Hides this customer from all portal user searches. This customer will still be visible to reference managers, but will appear with a * to indicate that it is hidden from portal users.
Note: Complete the Customer Search field prior to selecting a Program Status. Available Program Status options are determined by the Customer Search selection.
- Program Status: Select a status using the drop-down menu to inform sales users where they are at with a particular account.
- Reference Manager: Select the reference manager associated with this customer.
- Reference Source: Select the origin of your customer reference (e.g. annual event, mailing campaign, etc.).
- Spotlight Logo File: Upload an image for your spotlight logo. The maximum image size is 80x80 pixels.
- Social Network Source: Select the social network source for your customer.
- Page/Feed: Enter a newsfeed URL for your customer.
- Industry: Select the check boxes corresponding to the industry your customer belongs in. Click the blue check icon to select all check boxes. Click the X icon to clear all check boxes.
- Company Size: Select your customer's company size.
- Company Size (Revenue - USD): Select the yearly revenue for your customer's company.
- Geography - Region: Select the geographic region where your customer's company is located.
- Customer Since: Enter the date when this customer became a client.
- Net Promoter Score (1-10): Select your customer's net promoter score to indicate how willing they are to advocate for your company.
- Account Team: Enter the group of individuals responsible for this customer.
- Customer Website: Enter the URL of your customer's website.
- Flex Tags: Enter the various words and phrases you wish to use as search attributions against the customer (e.g. enter "SaaS" so sales users can locate this customer when performing a search on SaaS companies).
- Customer Summary: Enter a short, informative summary about your customer.

- Click Save to apply your changes.
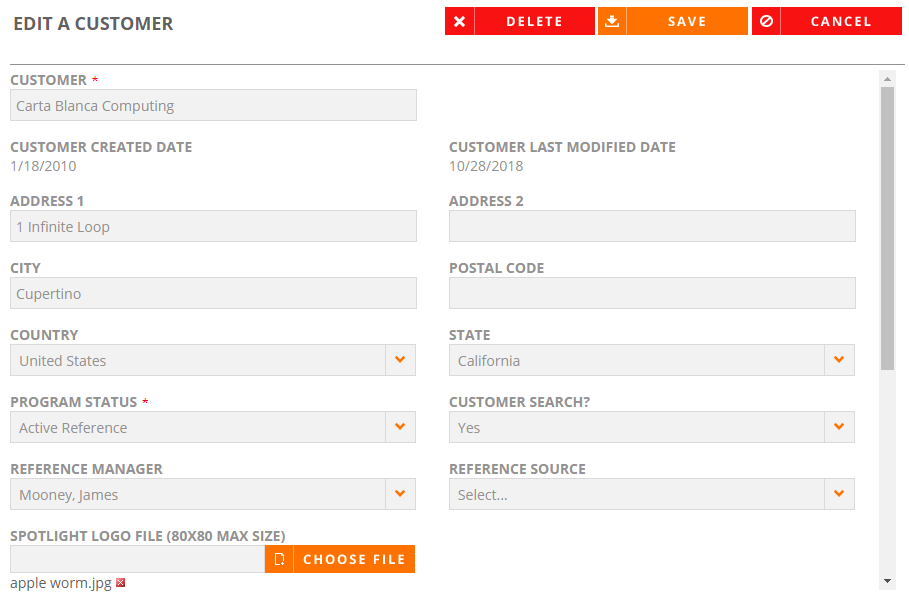
Note: Click the Return to Search button if you are finished with your edits and wish to return to the search results page.